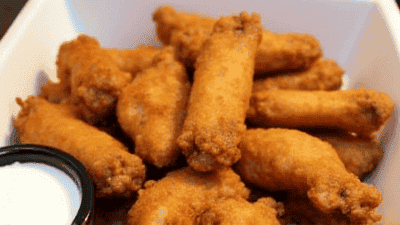
Ultimate Guide to Perfectly Fried Chicken Wings
Chicken wings have long been a favorite in kitchens and restaurants around the world, particularly as a party snack or game-day treat. Their crispy exterior, juicy meat, and ability to absorb a wide variety of flavors make them a versatile dish.
Chicken wings have long been a favorite in kitchens and restaurants around the world, particularly as a party snack or game-day treat. Their crispy exterior, juicy meat, and ability to absorb a wide variety of flavors make them a versatile dish. However, the secret to achieving perfectly fried chicken wings lies in the techniques used in preparation and cooking.
Understanding Chicken Wings
Anatomy of a Chicken Wing
Before diving into the cooking techniques, it’s important to understand the anatomy of the chicken wing. A chicken wing consists of three parts:
- Drumette: This is the meaty section that resembles a small drumstick. It is tender and juicy, making it one of the most popular parts.
- Wingette (Flat): This part is flatter and contains less meat between two bones. It’s loved for its crispy skin.
- Tip: The tip of the wing is often discarded, as it contains little meat. However, some cooks choose to fry them as well for their crispy texture.
Types of Chicken Wings
When it comes to chicken wings, you’ll typically find two main types available:
- Fresh Chicken Wings: These are uncooked wings sold in various packaging options. They provide the greatest flexibility in seasoning and marinating.
- Frozen Chicken Wings: Convenient and often pre-packaged with sauces or seasonings. While they can be a time-saver, they might not deliver the same level of freshness as fresh wings.
Selecting the Right Wings
Choosing the right chicken wings is crucial for achieving optimal flavor and texture. Here’s what to consider:
1. Freshness
Select fresh chicken wings from a reputable source. If possible, ask your butcher for wings that have been sourced locally. Fresh wings should smell neutral and have a bright appearance.
2. Size
While wings come in various sizes, opt for medium-sized wings, as they tend to cook more evenly. Large wings may have uneven cooking times, leading to overcooked or undercooked sections.
3. Skin and Fat Content
Look for wings with intact skin, as this contributes to the crispy texture during frying. A small amount of fat under the skin will help keep the meat juicy throughout the cooking process.
Preparation Techniques
Preparing your wings is just as important as cooking them. Proper preparation enhances flavor and texture.
1. Thawing Frozen Wings
If you’re using frozen wings, ensure they are properly thawed before cooking. The most effective methods for thawing include:
- Refrigerator Thawing: Place the wings in the fridge for 12 to 24 hours prior to cooking.
- Cold Water Thawing: For a quicker option, seal the wings in a plastic bag and submerge them in cold water for about 1-2 hours, changing the water every 30 minutes.
2. Cleaning and Trimming
For fresh wings, rinse them under cold water to remove any residual blood or impurities. Trim any excess fat or dangling skin to promote even frying and avoid flare-ups.
3. Marinating Wings
Marinating chicken wings enhances their flavor and can also improve tenderness. Here are some popular marinade options:
- Classic Buffalo Marinade: Combine hot sauce, melted butter, and vinegar for a zesty marinade.
- Soy Ginger Marinade: Mix soy sauce, ginger, garlic, and honey for a sweet and savory option.
- Garlic Parmesan Marinade: Combine olive oil, garlic, and grated Parmesan cheese for an Italian twist.
How to Marinate:
- Place the cleaned wings in a resealable plastic bag or bowl.
- Pour the marinade over the wings, ensuring they’re well coated.
- Seal the bag or cover the bowl and refrigerate for at least 1 hour or overnight for maximum flavor.
4. Drying the Wings
After marinating, pat the wings dry with paper towels to remove excess moisture. Dry wings are essential for achieving a crispy skin during frying.
Cooking Techniques
Frying chicken wings may seem straightforward, but there are key techniques to help you achieve perfect results. Here’s a step-by-step guide:
1. Choosing the Frying Method
You have several options for frying chicken wings:
- Deep Frying: This method involves submerging the wings in hot oil, which cooks evenly and quickly for a crispy exterior.
- Pan Frying: A good alternative to deep frying that uses less oil. It is suitable for those looking for a slightly healthier option.
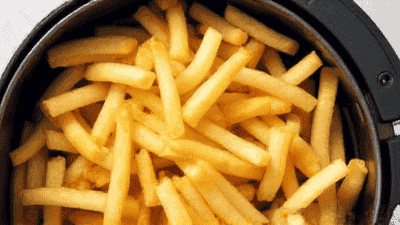
- Air Frying: This modern cooking method circulates hot air, producing crispy wings with much less oil than deep frying.
- Oven Baking: While this may not produce the same crispy results, it’s a healthier alternative that still yields tasty wings.
2. Preparing for Frying
Regardless of the frying method you choose, there are common steps to take before cooking:
- Seasoning: While marinating adds flavor, you can also season wings with salt, pepper, and other spices just before cooking.
- Coating (Optional): A flour or cornstarch coating enhances crispiness. Dredge marinated wings in seasoned flour before frying for an extra crunchy bite.
3. The Frying Process
Deep Frying
- Heat the Oil: Fill a heavy pot or deep fryer with oil, heating it to 350°F to 375°F. Use a thermometer for accuracy.
- Fry in Batches: Avoid overcrowding the pot, as this can lower the oil temperature and lead to greasy wings. Fry in batches of 6-8 wings at a time.
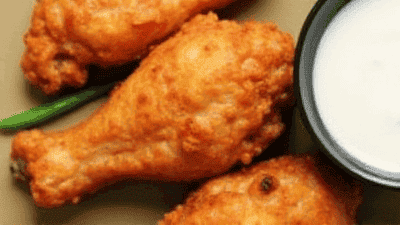
- Cooking Time: Fry wings for 8-10 minutes or until golden brown and internal temperature reaches 165°F.
- Drain on Paper Towels: Use a slotted spoon to remove the wings from the oil and let them drain on paper towels.
Pan Frying
- Heat Oil in a Skillet: Add enough oil to cover the bottom of the skillet and heat over medium-high heat.
- Fry the Wings: Add wings in a single layer and fry for about 10 minutes per side, ensuring even browning and cooking through.
- Drain Excess Oil: Remove wings and let them rest on paper towels to absorb excess oil.
Air Frying
- Preheat the Air Fryer: Set your air fryer to 360°F and preheat for 5 minutes.
- Arrange Wings: Place wings in a single layer in the air fryer basket, leaving space for air circulation.
- Cook Time: Cook for 25-30 minutes, shaking the basket halfway through for even cooking.
Oven Baking
- Preheat Oven: Set your oven to 425°F.
- Arrange Wings on a Rack: Place wings on a baking rack over a lined baking sheet to allow airflow.
- Bake Time: Bake for 40-45 minutes, flipping halfway through, until crispy and cooked through.
4. Flavoring After Cooking
Once cooked, you can toss the wings in your favorite sauces or glazes. Some popular options include:
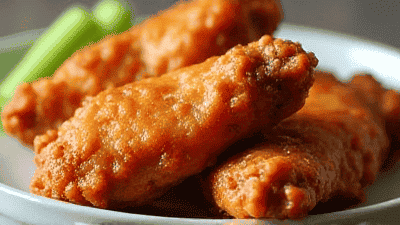
- Buffalo Sauce: A classic mix of hot sauce and butter for that zingy flavor.
- BBQ Sauce: Slather on tangy BBQ sauce for a sweeter take.
- Honey Garlic Sauce: Combine honey, soy sauce, and minced garlic for a sticky-sweet option.
5. Serving Suggestions
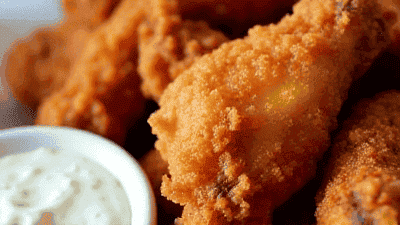
Serve your perfectly fried chicken wings with a variety of sides and dips to complement their flavor. Here are some ideas:
- Dips: Blue cheese dressing, ranch dressing, or sriracha mayo.
- Sides: Celery and carrot sticks mixed with a tangy dip, or a fresh salad.
- Garnishes: Fresh parsley, green onions, or sesame seeds for an appealing touch.
Tips for Perfectly Fried Chicken Wings
1. Temperature Control
Maintaining the correct frying temperature is crucial for crispy wings. If the oil is too cool, the wings will absorb excess grease and become soggy. If it’s too hot, they may burn outside while remaining raw inside.
2. Rest After Cooking
Allow fried wings to rest for a few minutes before serving. This helps the juices redistribute within the meat and ensures a moist texture.
3. Experiment with Flavors
Don’t hesitate to experiment with as many flavors and sauces as possible! From spicy to sweet, the range of wing flavors is almost limitless.
4. Use Sturdy Utensils
When frying, use tongs or a slotted spoon to handle the wings gently. This prevents tearing the crispy skin.
5. Keep Equipment Nearby
If you’re deep frying, make sure to have all necessary tools nearby, including a thermometer, slotted spoon, and paper towels.
6. Batch Cooking
If frying a large quantity, plan to work in batches to prevent oil cooling down. This will help you maintain consistency in cooking.
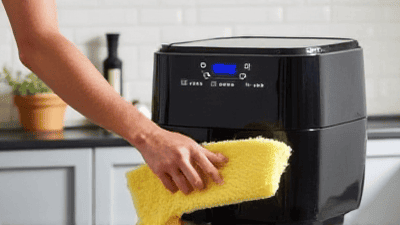
Cleaning Up After Frying
Frying can create a bit of a mess, so here are some tips for easy cleanup:
1. Dispose of Oil Properly
Never pour used oil down the drain. Allow it to cool, then pour it into a container for disposal in the trash or take it to a recycling center that accepts cooking oil.
2. Wipe Down Surfaces
Clean up any grease splatters on your stove or countertops with a suitable cleaner, ensuring your kitchen stays tidy.
3. Clean Frying Equipment
If using a fryer, disassemble the components and wash them in warm, soapy water. For deep pots, soak them if necessary, then scrub any stuck-on grease with a non-abrasive sponge.
Nutritional Considerations
While fried chicken wings can be indulgent, they can also be part of a balanced diet when eaten in moderation. Here are a few tips to make them healthier:
1. Use Skinless Wings
Consider using skinless chicken wings to reduce fat intake while still enjoying the flavor.
2. Bake Instead of Fry
Oven-baked or air-fried wings will significantly cut down on oil use while retaining the delightful textures and flavors you love.
3. Watch Sauces
Commercial sauces can be high in sugar and sodium. Consider making homemade sauces to control the ingredients and taste.
Conclusion
With the right techniques and tools, you can create perfectly fried chicken wings that will impress your family and friends. From selecting quality wings, preparing them properly, and mastering cooking techniques, each step contributes to a delicious end result.
Use this ultimate guide to embark on your chicken wing cooking journey; explore different flavors and styles while enjoying the health benefits of better cooking practices. Frying chicken wings might seem like a daunting task, but with practice and patience, you'll become an expert in no time.